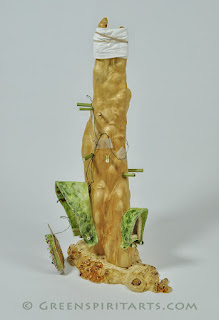
Greetings Everyone,
I'm so excited because the Hemp house is finally finished. But before I do the big reveal, here's how it went together:
I took the off-white hemp-paper roof panels and overlaid them with several layers of the fancy, green Japanese papers. Between some of the layers I collaged in some bits of a the darker hemp paper to give a more organic look. I added curled ends for a bit more whimsy and a corded edge under the final layer to give the outer edge a bit of extra strength. Here are all the new roofs:
As you can see the original cream coloured paper is still visible in the inside of the top-right roof.
Next I took the front panels and matched them up with their corresponding roof panel just to make sure they were all fitting together nicely. Many small adjustments had to be made to get the roofs to fit snugly around the wall panels, but eventually they were all paired up
However, I did not glue them in place because if I did I would not be able to install the lighting. But I did add extra batting around the edges so the light would not leak thru at the joints. Here you can see a detail of how that worked:
The pink arrow points to the rolled batting material that made a fat, felt-like worm that was glued in place. When the wall panel was laid in place, it would rest against this baffle and eliminate any small places where the light would leak out because the joints might not be a perfect match. The blue arrow shows how the original pattern had a cut-out design that was now covered over by the outer skin. That will play a very important role once the house is complete. Here you can see one of the windows from the back:
I did this same process with all seven windows. It took many days to get them all ready for installation. Now it was time to do the lighting but in order to do that I had to know exactly where each window was going to be placed, so the work of installing the windows and the wire with the lights happened in the same (painfully slow) step.
I took the base and created a small space where the batter pack would go by carving out the vertical portion of the base where it met the horizontal burl slab it all sat upon. Then I drilled holes into the base to feed the tiny wires up to the first window. There was too large a gap from that first window to the next window so I figured out a way to drill from one window to the next, but it was very tricky. At last the wire could be passed to the doorway panel which you can see below. Once I had all the positions of the windows figured out, I installed pegs which led up the rood sections by way of a small "floor". Here you can see the wire is in place and the pegs are as well.
The actual door way is connected by the one wire you can see, but there are more wires in the frame of the doorway for additional lights. You can see how the wire is taped to the base and winds around. I wanted to make sure the lights were reaching every window with no lights being seen in between the windows (though it was OK if the wire could be seen as I could disguise that later). This took a lot of fine-tuning to get right. (the top of the vertical section is covered because I grab this part a lot as I work on the piece and because the raw wood is so absorbent, it would have become discolored by the time I was finished making the piece)
Here you can get a feel for how each window is configured:
The roof of the window sits on the pegs that are affixed to the vertical base by way of a small floor that adds strength and keeps the roof spread out at the proper width. It is then carefully glued and matched to the uneven wood surface of the vertical part of the base. With the front wall being removable, I'm able to gain access to the interior and make sure that the joints meet absolutely flush and is sealed very well. Another fat roll of baffling is installed where the roof meets the vertical wood, just to make sure there is no light leakage there.
Finally, all the windows were in place after several more days of detailed work. Here you can see them all on the base. The front walls are not fully glued in place just yet, because I need to make sure everything is right where I want it. Once the wall is glued in place I am no longer able to make any adjustments.
Next it was time to test it and make sure it was all working as I had hoped.... drum roll please....
YAY! It worked! Now you can see how the cut-outs from the under-layer allow a pattern of light to come out of the roof, a bit like a sky-light in reverse.
I was really pleased with how this was going. The test done, I glued all the front panels in place and let them dry for an extra day.Now all that was left was to add some trim around each of the windows and some landscaping details...that comes next!!


No comments:
Post a Comment